Product
Solutions
How to Use Inigo with Apollo Gateway and Better Understand Your Subgraphs
Overview
In Subgraph Visibility in GraphQL, we examined Inigo’s subgraph visibility features at a high level. This blog post will go a level deeper on how to implement subgraph visibility with Apollo Gateway. We will walk through the setup of Inigo and what changes need to be made to your Apollo Gateway implementation.
Why Inigo to Understand Your Apollo Gateway or Router Subgraph?
As we covered in Subgraph Visibility in GraphQL, there are four basic needs for visualizing and understanding your subgraphs, which are:
- Performance monitoring: It's important to monitor metrics like response times, error rates, and throughput for each subgraph. This allows teams to identify performance bottlenecks and optimize the subgraphs accordingly.
- Usage analytics: Understanding how each subgraph is being used—which fields and types are queried most frequently—helps teams make better decisions about schema design and resource allocation.
- Error tracking: Having visibility into errors at the subgraph level simplifies debugging and troubleshooting. Teams can trace errors back to the source subgraph and subgraph owners have the necessary context to resolve issues.
- Security monitoring: Monitoring security-related metrics for each subgraph, like authentication failures or abnormal usage spikes, helps identify potential vulnerabilities or attacks early on. Error tracking: Having visibility into errors at the subgraph level simplifies debugging and troubleshooting. Teams can trace errors back to the source subgraph and subgraph owners have the necessary context to resolve issues. Once you complete the steps to set up Apollo Gateway with Inigo, you can independently apply these capabilities to not only the supergraph but the subgraphs as well.
GraphQL Gateway Demo Application
There is a comprehensive guide available on GitHub to walk you through installing and running Inigo with Apollo Gateway, and this blog will summarize the steps.
On your local machine, you should clone the https://github.com/inigolabs/workshops repository. We will be working with the apollo-gateway-demo subdirectory in this repository. This demo application in this subdirectory contains four microservices, each owning its own part of a federated GraphQL schema. There is an Apollo Gateway implementation that joins the subgraphs into a supergraph that can be easily queried using the Apollo sandbox.
You will likely want to open the apollo-gateway-demo subdirectory in VS Code. Once there, in the terminal, you should run npm install to build the current version of the project before continuing. The microservices can be started with npm run start-services, and, in a separate terminal, the gateway can be started with npm run start-gateway. The gateway will then be available at http://localhost:4000, where you can access the Apollo sandbox. To make sure everything is running correctly, try to execute the following my_reviewed_products_to_buy_again query:
query my_reviewed_products_to_buy_again {
  me {
    name
    reviews {
      product {
        name
        price
        shippingEstimate
        inStock
      }
      review: body
    }
  }
}
You should get a query response as shown in Figure 1:
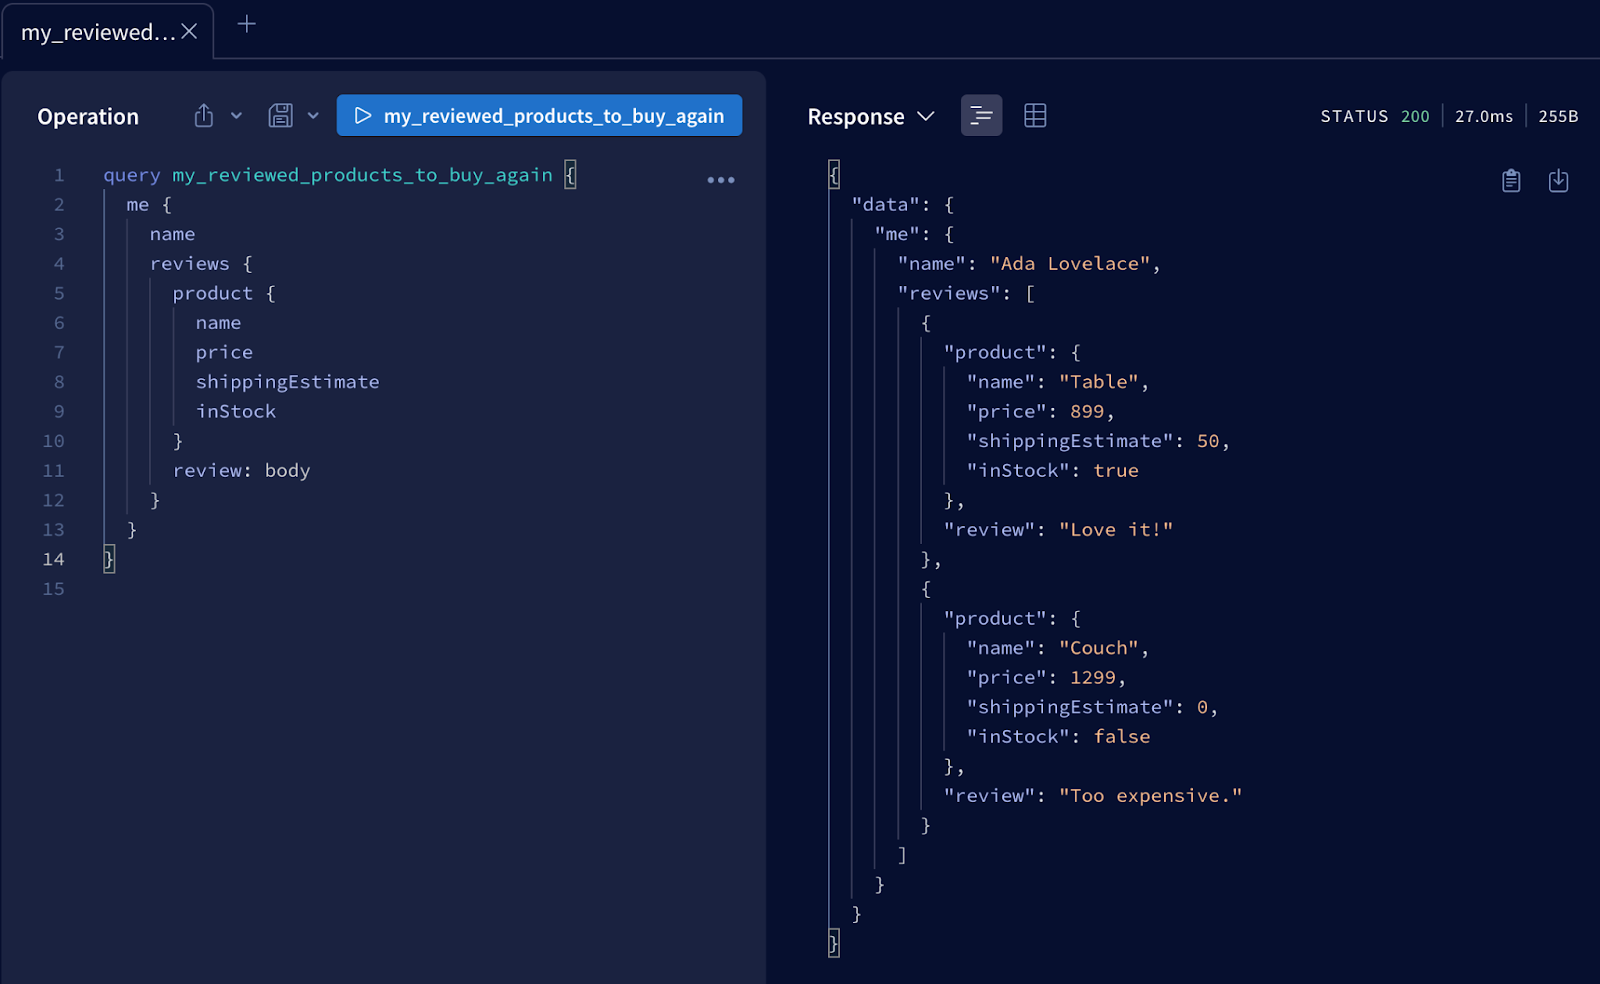 Figure 1. Results of the my_reviewed_products_to_buy_again query in Apollo sandbox
This sample query will exercise all four microservices for this supergraph, which are accounts, products, inventory, and reviews. If you would like to know more about the implementation of this demo application, including the subgraph schemas, details are available in the README.
Installing Inigo into the Apollo Gateway Demo Application
The README provides a detailed walkthrough, but here are the basic steps to install Inigo in Apollo Gateway:
- Install the inigo CLI
- Create a Gateway configuration and apply it with the Inigo CLI
- npm install inigo-js and npm install the Inigo middleware library
- Add the require imports for Inigo (in JavaScript)
- Add InigoPlugin and InigoFetchGatewayInfo to your code
Apply the Gateway Configuration with Inigo CLI
For Inigo, a Gateway configuration is needed to set up the Inigo Service for the various subgraphs that your application has. The demo application has a gateway.yml file that contains the following configuration:
kind: Gateway
name: apollo-gateway-demo
spec:
  services:
    - name: accounts
      url: "http://localhost:4001/graphql"
    - name: reviews
      url: "http://localhost:4002/graphql"
    - name: products
      url: "http://localhost:4003/graphql"
    - name: inventory
      url: "http://localhost:4004/graphql"
This configuration can be applied using inigo apply inigo/gateway.yml. For all of the details, once again, please see the README. After this has been applied, you will be able to see the service and its subgraph services in the Inigo UI as shown in Figure 2:
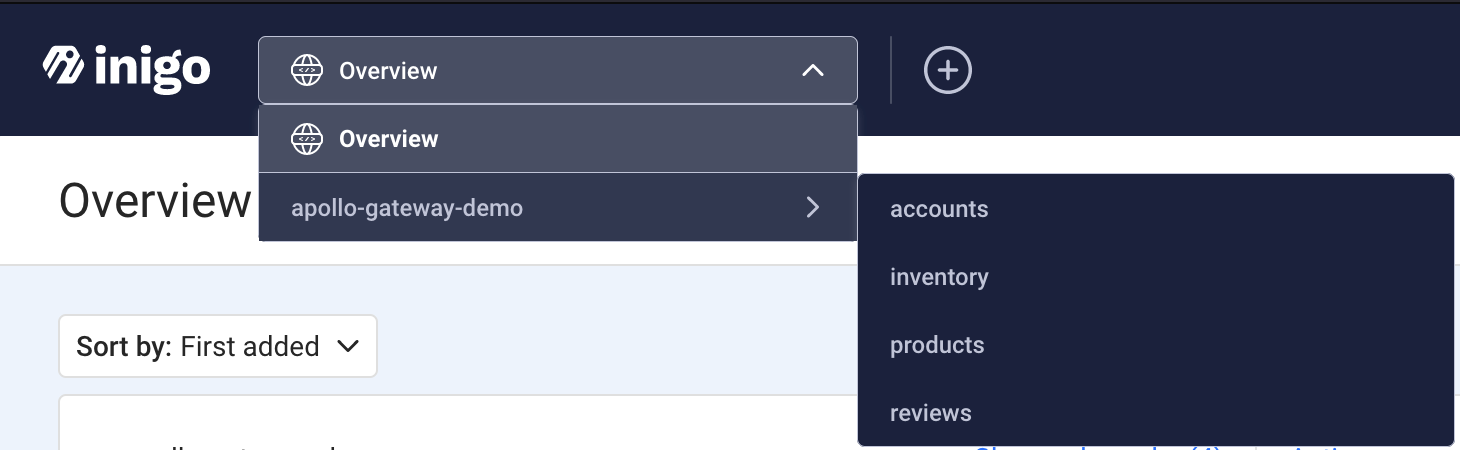 Figure 2. Supergraph and subgraph services in the Inigo UI
NPM Module Installations for Inigo
To support the required code changes in the next section, two NPM dependencies must be installed, and it depends on your operating system and CPU. For a Mac with an M1/M2, you would run:
npm install inigo.js
npm install inigo-darwin-arm64
There are more specific details available in the README.
Apollo Gateway Code Changes for Inigo
The Apollo Gateway Demo Application gateway.js has commented code blocks you can uncomment underneath the //INIGO: comments within. The main sections that need to be added to support running the Inigo middleware in Apollo Gateway are:
Includes (gateway.js)
// INIGO: Uncomment below:
const { InigoPlugin, InigoRemoteDataSource, InigoFetchGatewayInfo } = require("inigo.js");
CustomRemoteDataSource (gateway.js)
// INIGO: use InigoRemoteDataSource instead of RemoteGraphQLDataSource.
class CustomRemoteDataSource extends InigoRemoteDataSource {
  async onBeforeSendRequest({ request, context }) {
    if (context.req && context.req.headers) {
      // pass all headers to subgraphs
      Object.keys(context.headers || []).forEach((key) => {
        if (context.headers[key]) {
          request.http.headers.set(key, context.headers[key]);
        }
      });
    }
  }
  async onAfterReceiveResponse({ request, response, context }) {
    return response;
  }
}
InigoPlugin and InigoFetchGateway Setup (gateway.js)
  // INIGO: InigoPlugin must be instantiated before ApolloGateway is started
  const inigoPlugin = InigoPlugin();

  // INIGO: execute InigoFetchGatewayInfo() and use the result as a param for your custom data source
  const info = await InigoFetchGatewayInfo();
Changes for the Apollo Gateway and Server (gateway.js)
 const gateway = new ApolloGateway({
    supergraphSdl,
    __exposeQueryPlanExperimental: true,
    // INIGO:
    buildService(service) {
      return new CustomRemoteDataSource(service, info, true);
    },
  });

  const server = new ApolloServer({
    gateway,
    engine: false,
    subscriptions: false,
    // INIGO:
    plugins: [
      inigoPlugin,
    ],
  });
Running Apollo Gateway with Inigo
Using the Inigo token that you obtained while setting up Inigo, using either the Inigo UI or inigo create token, you can now start up Apollo Gateway with the Inigo middleware installed.
export INIGO_SERVICE_TOKEN="ey..."
npm run start-gateway
Once started, you can return to the Apollo Sandbox again at http://localhost:4000 and run the my_reviewed_products_to_buy_again query (see above) again. Please run this query several times to generate data to view on the Inigo Analytics UI.
Viewing Supergraph and Subgraph Data in Inigo Analytics
Now that you have Inigo running with Apollo Gateway, and have executed the my_reviewed_products_to_buy_again sample query several times, you should be able to see query metrics available on https://app.inigo.io under the apollo-gateway-demo service in the dropdown menu (see the screenshot above).
As shown in Figures 3 to 7, you can navigate to the supergraph and subgraph Analytics from this menu, as highlighted in the red boxes. On each of these screens, you will have an independent view of the analytics that were run against the federated query execution.
In Figures 3 to 7, you can see how the federated my_reviewed_products_to_buy_again GraphQL query is decomposed into separate queries for each of the four microservices, each of which provides its own subgraph as described in the README.
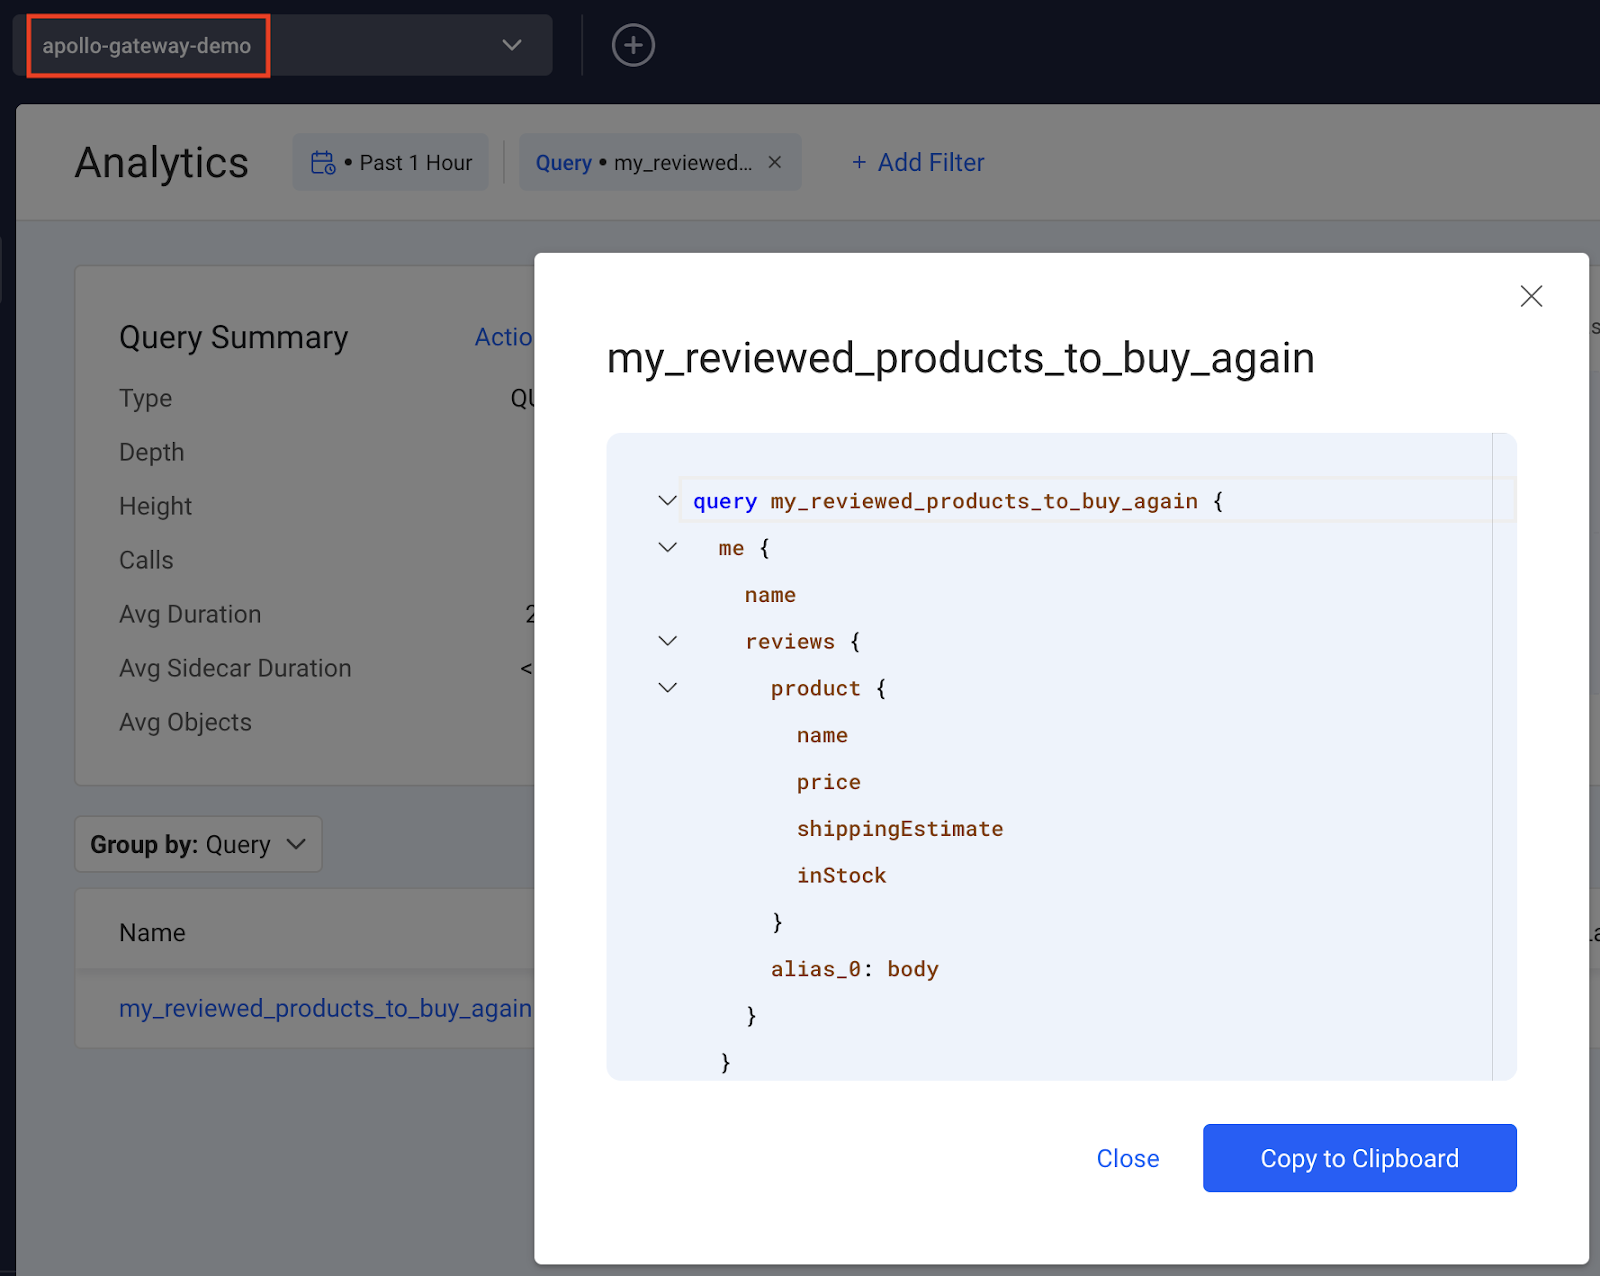 Figure 3: The supergraph my_reviewed_products_to_buy_again query as shown in Inigo Analytics
 Figure 4: The accounts subgraph query as shown in Inigo Analytics
 Figure 5: The product subgraph query as shown in Inigo Analytics
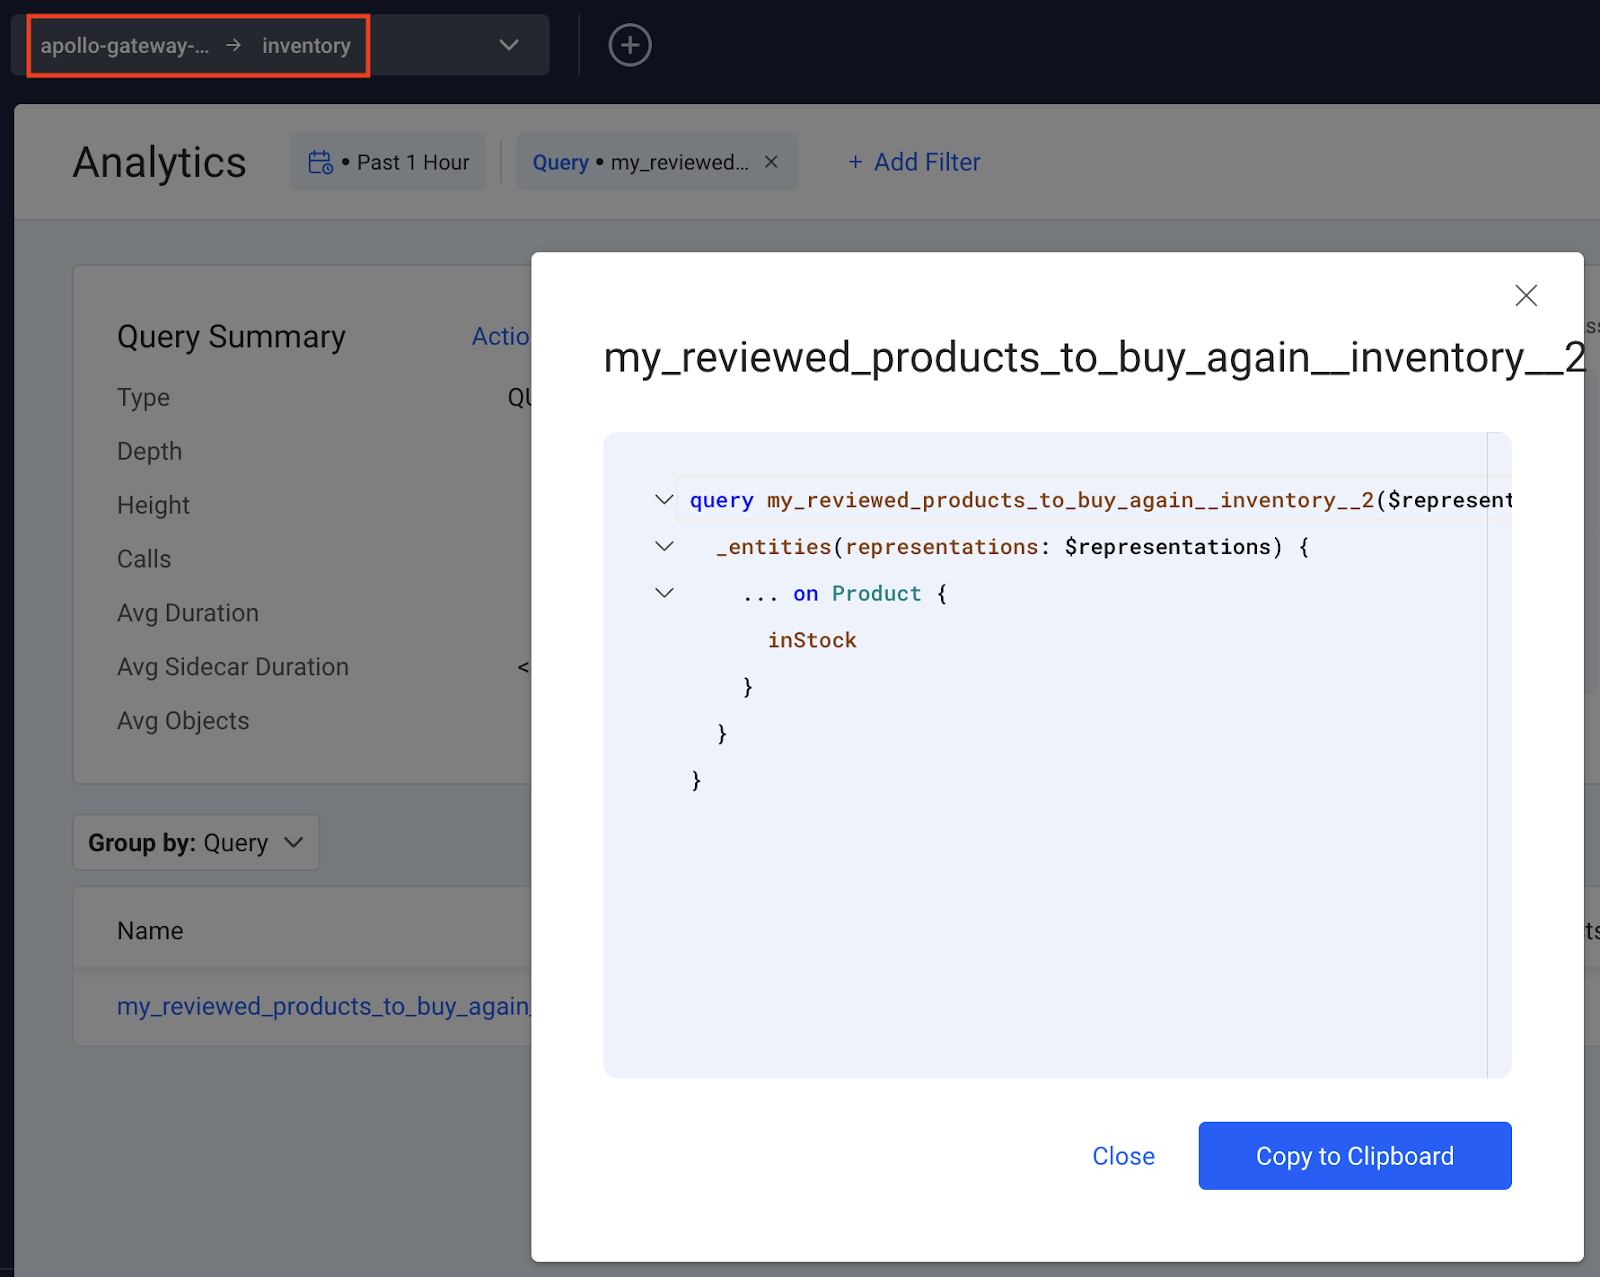 Figure 6: The inventory subgraph query as shown in Inigo Analytics
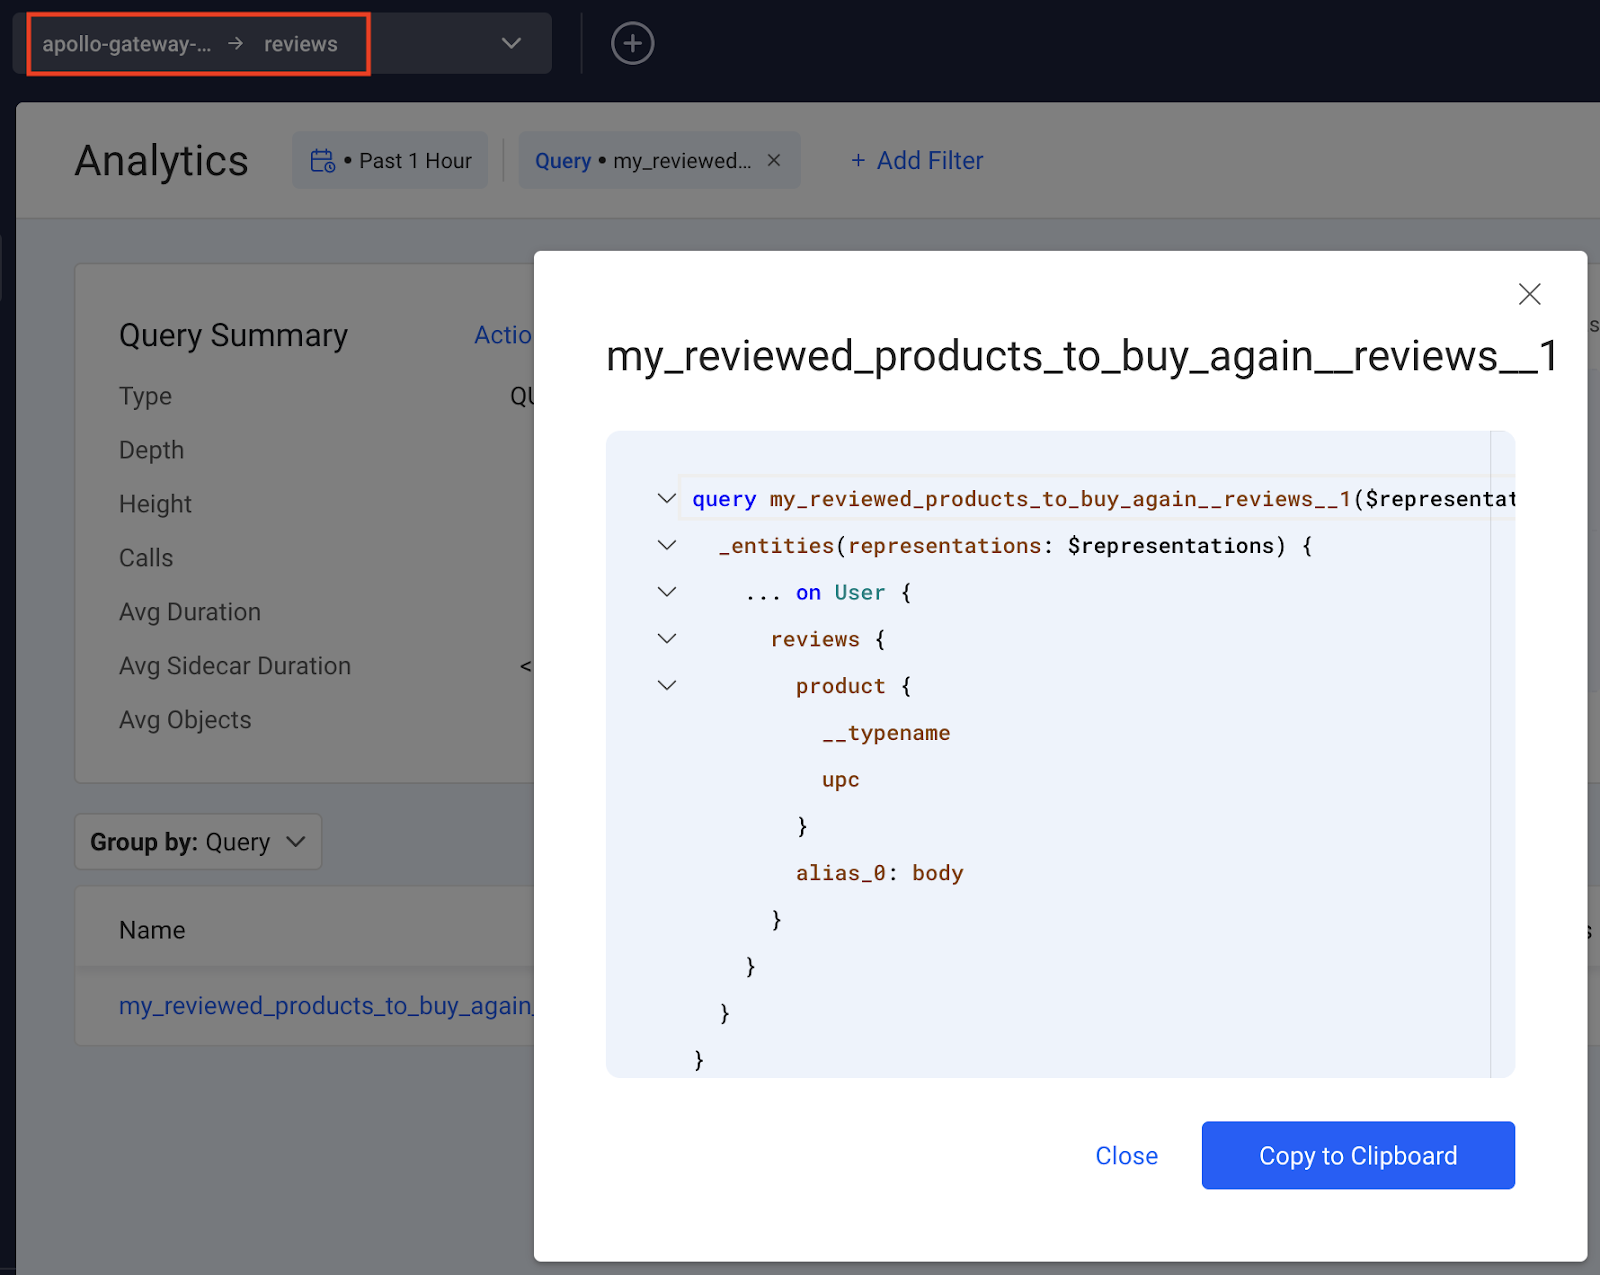 Figure 7: The reviews subgraph query as shown in Inigo Analytics
Next Steps and Conclusion
Now that you have set up and run Inigo with Apollo Gateway, you can further explore the capabilities of Inigo with the supergraph and each independent subgraph. You will gain a deeper understanding of how your subgraphs are being utilized within the context of your supergraph and your Apollo Gateway implementation.
If you’d like to learn more and see a live demonstration of using Inigo with Apollo Gateway, we invite you to attend the upcoming webinars:
July 13th, 9:30 AM PDT, 6:30 PM CET - DONE July 18th, 5:00 PM PDT, 10:00 AM AEST - DONE